Thanks for all your sweet comments about our nursery plans - and for your changing table suggestions! There's so much conflicting information out there about what to buy that it can feel totally overwhelming, so I really appreciate hearing from you about what worked for your family :)
After Danielle posted this gorgegous
home tour on her blog yesterday, I was immediately inspired by the black trim detail on the sofa:
What an easy way to add some interest to my newly-slipcovered ottoman...
 |
| {before, this boring white slipcover needed some dressing up} |
So I bought a roll of black grosgrain ribbon and broke out my trusty glue gun...
 |
| {after, with a little more oomph} |
For the top, I simply folded the ribbon over at each corner and secured it with a small dab of glue. Since my slipcover had rounded corners, this approach worked best for me, but there are lots of other ways you could do it.
And just for fun, here's a little side-by-side comparison:
So, do you have any projects planned for the weekend? A huge Happy Mother's Day to all the mommas out there - enjoy your special day!
Linked up to
If you've seen recent pictures of our living room, you may have noticed that our coffee table is a little small for the new layout. I knew the
$10 ottoman I picked up at a thrift store ages ago would be the perfect coffee table extender - it just needed a new slipcover. Luckily I had lots of fabric leftover from my
DIY chair slipcover, so last week I broke out my sewing machine and whipped up this guy.
A couple of books add some colour to an otherwise plain piece and I like how it does double-duty as a footstool or a surface to rest your snack/drink/whatever.
Now if I could just find the perfect area rug...
Remember this chair I found on Kijiji for $20?
 |
| (photo from Kijiji posting) |
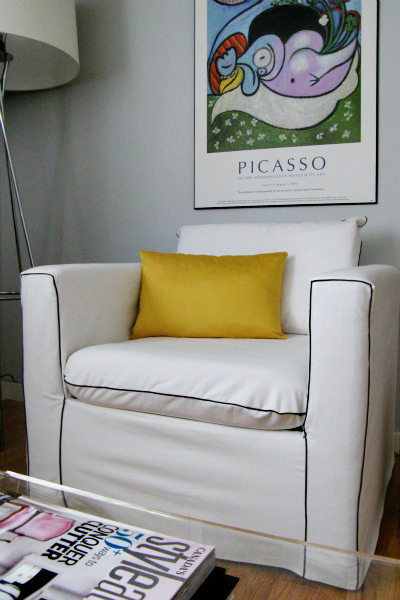
Admittedly not so pretty, but I loved the lines and the price was right. Last weekend I went to Fabricville to look for some slipcover fabric and found a white cotton/linen mix on clearance for $4/metre. Since it's only my second slipcover (this
reversible ottoman slipcover being my first), I decided against any kind of pattern, which I'd have to worry about matching up. I also didn't want to spend a lot of money on fabric in case my project was a total bust (not the strongest sewing skills over here). I seem to always overestimate the amount of fabric I'll need, and of the 6 1/2 metres I bought, I probably used somewhere between 3 and 4, which puts the total cost of the chair at around $35 (and it should be easy to find other uses for the leftover fabric - I've already got a project in mind).
Anyway, here's how it turned out (I know, it desperately needs to be ironed):
In addition to a good ironing, it needs a throw pillow or two, and I have to finish sewing the cushion covers (one side is still open while I try to work up the courage to try sewing in zippers).
A bunch of bloggers have posted slipcover tutorials, so I won't go into too much detail - I basically used kraft paper to create a template by holding it up to the chair and tracing each piece of upholstery. Then there was lots of pinning and re-pinning on the chair to get a tight fit. Once I had sewed the pieces together, I did a test fit on the chair and ripped out and re-sewed any seams that looked too wonky. Then I hemmed the bottom and sewed the cushion covers like you would any pillow. I spread it out over a couple of days, but it could easily be done in an afternoon.
We finally got a break from the rain this weekend (don't worry - it's back already), so Adam and I took advantage of the sunny weather and spent most of Saturday working outdoors (more on that later). But first I sat down with my sewing machine to finish my first slipcover. Here's a little before and after - drum roll please:
Ta da! Can you tell I'm excited about how it turned out? Luckily the whole making it reversible thing was easier than I thought. Basically,
I made two slipcovers, then sewed the bottom hemlines together so one "sits" inside of the other.
Which means I can choose between Side A:
And Side B (which really needs to be ironed, but probably won't be):
And the whole thing is easily removed for washing. Here's how it looks in our living room, where it's currently acting as a side table, but can easily be pulled out for extra seating when need be. Not bad for $10.