My first upholstery project: is this what progress looks like?
Remember this chair? The one I bought two months ago with grand plans of tackling my first upholstery project? No worries if you completely forgot about it. Apparently, I did too. Well, over the weekend I decided it had been taking up space in our garage for long enough (yes, that's actually my garage and not a crack den I'm working in) and finally got to work. I only got as far as removing all of the original upholstery, but that's progress. As you can see, the seat back's webbing is still in good shape, but the seat's webbing (not pictured) needs to be redone. I'm planning to sand and refinish the frame before I get to that, though.
I'm feeling a little overwhelmed by what I've taken on, but - perhaps foolishly? - still optimistic. I've got a million little tacks to remove, so that's next. Wish me luck!
0
comments
Posted by
nove
Labels:
DIY,
furniture makeover,
upholstery
Before & After: Wooden chest with DIY leather handles
A few years ago, Adam's parents handed over his old toy box, which had been collecting dust in their garage. It's been in our basement since we moved, but I recently dug it out for a little makeover. It had lots of vintage charm - it's actually an old WWII locker - but it needed some work.
Adam's childhood self misspelled "psycho" across the top with Sharpie (um, what?), so I started by sanding the whole thing with my mouse sander. I worked from a medium grit to a fine grit, just to smooth everything out and get it ready for staining. You can still see a couple of places where Adam tried carving his name into the top, but I think it adds character. Plus, one day Hannah may appreciate knowing that it belonged to her dad :)

After sanding, I applied one coat of Minwax stain in 'Early American'. I've used a brush to apply stain in the past, but I prefer to work with a rag - much better control that way, at least for me. I let the stain dry overnight, then applied a coat of clear protective finish.
I also switched out the rope handles for a really simple DIY leather version. I had to sacrifice an old belt, but it was worth it! I used roofing nails to secure the leather to the box (I added a piece of scrap wood inside the box to give the nails something to grip; the existing holes for the handles are pretty big and the sides of the box are pretty thin).
The interior got an upgrade too. CIL recently sent me some of their 
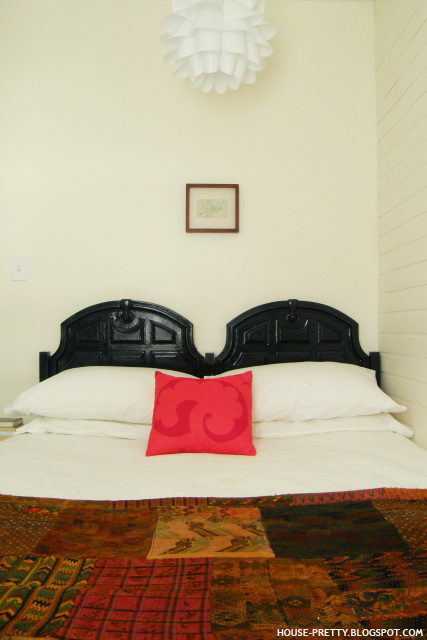
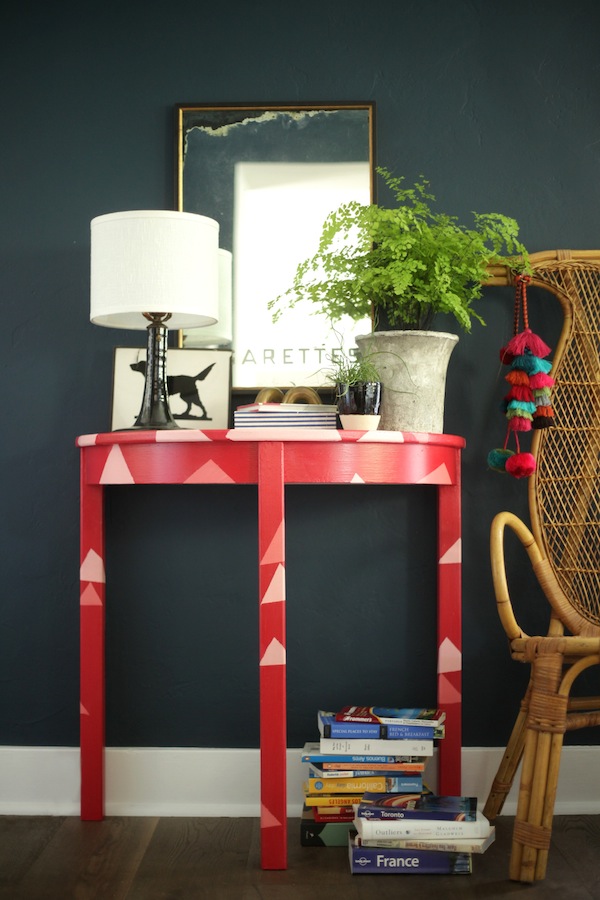
Smart Wash & Wear paint to try, and what better place for extra durable, washable paint than inside a toy box? The colour is called Seashell Pink and it's a really pretty shade of soft pink (I think it would look great on a ceiling or used on bedroom walls like this).
The paint is supposed to be extra durable and washable, and the primer is built right in, which I love. I added the wood blocks for the handles after I'd already painted the interior and despite lots of dings with my hammer (and a few from the cinderblock I used to hold the wood in place), not a single touch-up was required. Pretty good, right?
Now we have the perfect spot to stash some of Hannah's favourite toys downstairs, though I still need to add a safety latch to the inside of the lid (to prevent it from slamming down on little fingers). When Hannah no longer needs it, I can definitely see us storing blankets or other household items in here.
While CIL provided me with a can of their Smart Wear & Wash paint, they did not ask me to write a review. All thoughts and opinions are my own. You can see other projects I've done using CIL paint - that I bought myself - here and here.
0
comments
Posted by
nove
Labels:
DIY,
furniture makeover,
hardware,
organization,
storage
Shopping the 50-mile yard sale
We went to the annual 50-mile yard sale in Musquodoboit Valley on Saturday. If you like yard sales, it's not to be missed. My mom came with us this year and everyone found something to take home, even Hannah. One of my favourite finds was the sweet little milk glass dish above for $1. I also took home a small blue and white plate for the growing plate wall in our dining room (50 cents), a water jug for camping ($1), a set of plastic Easter eggs (weird, but they were only 50 cents and still in their original packaging), and the awesome beach chairs below. We paid $5 for the pair.
Obviously the fabric has seen better days, but it's easily replaced and the frames are in good shape - they just need a facelift. When I was placing the fabric order for my rocker with Tonic Living (you'll have to wait and see which fabric I chose), I bought a yard of this striped outdoor fabric too.
Now I really wish beach season wasn't over...
0
comments
Posted by
nove
Labels:
furniture makeover,
Living Room,
my life,
yard sale
More basement updates
Adam's teaching schedule picks up with the start of the school year, so I took advantage of the last days of summer break to fix up his basement studio. I started by moving the large jute rug from our living room downstairs and layering a couple of smaller rugs on top for colour (our dog and rugs just don't mix, so as much as I'll miss it upstairs, it's much safer in the off-limits basement).
After rearranging the layout and doing some major purging/reorganizing, I decided to give Adam's desk and a couple of mismatched chairs a fresh coat of paint. For the chairs, I used Rust-Oleum's Meadow Green in gloss. I love this colour! The desk is the same colour as our dining room table.
I found this cute vintage desk lamp on Kijiji. The compartments are perfect for corraling Adam's drum keys and guitar picks.
My favourite update may be the pegboard storage. I swiped the pegboard from our garage and gave it a fresh coat of white paint. It not only gives Adam a much-needed place to store cords and headphones, it also covers up the horrible texture on this small section of wall.
I also picked up some new light fixtures for a steal, but we haven't had a chance to install them yet. I think Adam is enjoying the new layout, but we'll see how long the clean desktop lasts ;)
0
comments
Posted by
nove
Labels:
Basement,
furniture makeover,
my house
My first upholstery project: choosing the fabric
My fabric samples from Tonic Living arrived on Monday. Narrowing my choices down to four was hard enough; now I have to commit to just one. I'm planning to refinish the wood in a medium tone, slightly lighter than the current finish. You can see the full "before" and my rocker inspiration here.
Which one would you choose?
Clockwise, from top left:
Billow, coral
Casablanca geo, citrine
Carpet ride, radish
Soho, kiwi
0
comments
Posted by
nove
Labels:
DIY,
furniture makeover,
upholstery
My first upholstery project + the right way to DIY
You guys are the best. Seriously. Thanks so much for your advice about my outdoor table dilemma. I'm going to try your suggestions this weekend, so I should have an update for you next week!
In other news, this was delivered to my house last night:
I've been itching to try an upholstery project, but I needed something low-risk (ahem, low pressure) for my first go. This chair seemed like a safe bet - let's hope I don't end up regretting those words!
I thought about painting the frame, but after searching for inspiration on Pinterest, I'm now leaning toward refinishing the wood (ugh). I'm also drawn to bright fabrics and bold prints (although the neutral rocker below is pretty sweet). Here's some of what's inspiring me:
What do you think?
P.S. If you've ever tackled a home improvement project with your significant other, this will make you laugh.
Happy weekend! xo
In other news, this was delivered to my house last night:
![]() |
| seller's photo |
I've been itching to try an upholstery project, but I needed something low-risk (ahem, low pressure) for my first go. This chair seemed like a safe bet - let's hope I don't end up regretting those words!
I thought about painting the frame, but after searching for inspiration on Pinterest, I'm now leaning toward refinishing the wood (ugh). I'm also drawn to bright fabrics and bold prints (although the neutral rocker below is pretty sweet). Here's some of what's inspiring me:
![]() |
| Clockwise from top: 1, 2, 3, 4 |
P.S. If you've ever tackled a home improvement project with your significant other, this will make you laugh.
Happy weekend! xo
0
comments
Posted by
nove
Labels:
DIY,
furniture makeover,
upholstery,
weekend links
More paint problems - help!
One of the projects I quickly wrapped up before Hannah's party (see what I did there?) was the makeover of an $8 table I bought at Value Village...in APRIL (the shame). You may remember me asking for your decorating advice here. I went with Option #1 using Rust-Oleum Painter's Touch 2X gloss spray paint in white (and a clear coat on the exposed legs).
(I so need to paint this last section of foundation!)
The legs turned out great, but the top is a different story. I'm pretty sure it's MDF and although I lightly sanded it before and in-between painting, the finish didn't turn out that great. Then it rained a lot and this happened:
Bubbles! Not the paint, the actual tabletop. I guess the MDF was still able to absorb water through the paint (which is meant for outdoor use).
So, onto plan B. I know I want to salvage it, I'm just not exactly how - any ideas?
0
comments
Posted by
nove
Labels:
DIY,
exterior,
furniture makeover,
patio,
spray paint
Before & After: Painted blue dining table
It took me long enough, but the dining room table is finally finished! The colour is Behr's Dark As Night and I used Minwax's Polyacrylic finish in gloss to seal and protect it (and give it some shine, of course).
I had some trouble with the gloss finish initially. It turns out it really is a good idea to follow the directions on the can ;)
Now we just need to replace the light fixture. I think Adam and I have finally agreed on one, but I'm not quite ready to pull the trigger yet. Anyway, our focus has shifted outdoors to the patio (formerly known as our backyard mud pit) - we're in a mad rush to finish in time for Hannah's birthday!
0
comments
Posted by
nove
Labels:
Dining Room,
DIY,
furniture makeover,
my house,
Paint
Paint problems
Sometimes projects don't go exactly as planned. My dining table makeover is nearly finished, but I hit a snag during the last step: applying the polyacrylic finish that will protect the new paint job and give the table the glossy look I want.
I've never worked with a gloss finish before - except in spray form - so this has been a "learning" experience for me (see also: frustrating, time-consuming). I used a brush on the base, which worked really well. I tried using a brush on the top, but the brush marks were really obvious and streaky, so I decided to try using a foam roller and...bubbles galore! Not good. So last night I sanded out the bubbles and went back to the brush. It went on much better this time - maybe the insane humidity helped? - so one more coat and I think I'm done. Lesson learned: don't rush to roll.
As soon as I can snap some decent pictures of the finished table I'll post them here. I really can't believe how much the colour has transformed our dining room - even Adam has commented on how much he likes it and he never notices these things.
Happy Wednesday!
0
comments
Posted by
nove
Labels:
Dining Room,
DIY,
furniture makeover,
Paint
Guest room headboard: after
The guest room headboard is done! You can see the before here. The surface was a wood veneer, so I started with a coat of my favourite Zinsser oil-based primer. The paint is leftover from our shutters, garage door and foundation. The colour is a custom Manor Hall tint, but it's a very dark green - almost black.
I finished it with two coats of Rustoleum's Ultra Cover spray paint in clear gloss. I really love the gloss finish - it took the headboard from just OK to something special.
Now we just need to install new baseboard and quarter round, and we can call this room done. So close!
0
comments
Posted by
nove
Labels:
DIY,
furniture makeover,
guestroom,
Paint
Guest room headboard: before
Whether Craigslist or Kijiji is more popular in your city, you've probably had the experience of spotting a great deal and rushing to send a reply (anyone else hate it when the seller insists on phone calls?), only to find out that someone's ahead of you in line. Enter crushing disappointment. Seriously, I was second-in-line for a set of matching teak chairs (at a ridiculously low price) more than two years ago and I still think about them with sadness.
It happened to me again on Tuesday, but I still emailed the seller back and asked her - without much hope - to let me know if it didn't work out. Well, the buyer never showed and yesterday morning this headboard was delivered to my door:
(WHY have we not tiled our entry yet?! I really am going to get on that.)
It's not much to look at right now, but with a little paint I think it's going to be all kinds of awesome. It will be going in our guest room, since it's about time our guests had a proper headboard. Hell, maybe we'll even be inspired to finally install the baseboard in that room.
In terms of colour, I want to go bold. Thanks to the colourful quilt on the end of the bed, I have plenty of (too many?) colours to choose from, but here's a hint as to where my head is at. Stay tuned!
![]() |
| Pinterest via House of Fifty Mag |
![]() |
| Pinterest via inspiredbythis |
![]() |
| Pinterest via elementsofstyle |
![]() |
| Pinterest via LGN |
0
comments
Posted by
nove
Labels:
DIY,
furniture makeover,
guestroom,
Paint
Help me choose a makeover for this darling side table
Option 1
![]() |
| via |
I love how my dipped chair turned out, so it could be fun to try something similar with this table. I like West Elm's crisp white version, but I could also go for a glossy green or a warm pink.
Option 2
![]() |
| via |
![]() |
| via |
Speaking of colour, this could be the perfect excuse to finally try the neon trend. Oh, and I'll take a pair of those chairs, thankyouverymuch.
Option 3
![]() |
| via |
![]() |
| via |
![]() |
| via |
I swear I didn't purposely correspond the number of images to the option number, by the way. A good friend gave me a book on stencilling for my birthday and it has me feeling inspired to try something a little different. I'm especially digging the triangles in the first and third images.
So, there you have it. Which option gets your vote?
0
comments
Posted by
nove
Labels:
DIY,
exterior,
furniture makeover,
patio
Sewing in a zipper
Remember my DIY gold chair? It quickly earned a permanent spot in our living room...and Adam has been complaining about it ever since. Like my inspiration, it didn't have a back seat cushion, which looked great but was admittedly quite uncomfortable. I bought a down-filled bed pillow (queen-sized) and one yard of Robert Kaufman fabric and set out to
Since the back of the pillow would be visible through the chair, I knew I couldn't get away with my go-to envelope pillow. I would have to sew a zipper. Dun dun duuun! As you can see in the photo above, it didn't turn out perfectly (why didn't I use white thread?!), but it works. And you know what else? When you break it down into steps, it's actually quite easy to do!
If you're ready to conquer your fear of zippers, check out this tutorial (I found this one helpful too). And since every sewing machine is a little different, you may want to check out your machine's manual too (mine has a short section on how to use the zipper foot that I found helpful, especially since it works a bit differently than what the tutorials showed).
So, conquer any sewing fears lately? Ever lose a form-versus-function argument with your s.o.?
0
comments
Posted by
nove
Labels:
DIY,
furniture makeover,
Living Room,
my house,
polka dots,
sewing
Subscribe to:
Comments (Atom)


+(1).jpg)
+(1).jpg)


