One of the projects I quickly wrapped up before Hannah's party (see what I did there?) was the makeover of an $8 table I bought at Value Village...in APRIL (the shame). You may remember me asking for your decorating advice here. I went with Option #1 using Rust-Oleum Painter's Touch 2X gloss spray paint in white (and a clear coat on the exposed legs).
(I so need to paint this last section of foundation!)
The legs turned out great, but the top is a different story. I'm pretty sure it's MDF and although I lightly sanded it before and in-between painting, the finish didn't turn out that great. Then it rained a lot and this happened:
Bubbles! Not the paint, the actual tabletop. I guess the MDF was still able to absorb water through the paint (which is meant for outdoor use).
So, onto plan B. I know I want to salvage it, I'm just not exactly how - any ideas?
More paint problems - help!
0
comments
Posted by
nove
Labels:
DIY,
exterior,
furniture makeover,
patio,
spray paint
Spray-painting a light fixture (without taking it down)
It was a beautiful day here yesterday, so I took advantage of the opportunity to leave the front door open and gave our entryway light a little update. It was so easy. I took the old shade off, taped cardboard to the ceiling and a sandwich bag over the light, then broke out the spray paint (Rustoleum's Metallic spray paint in ORB).
Hannah and I went for a long walk while it dried (Adam stayed home with the open door) and then we hit up Home Depot for a new shade. I ended up choosing the 2013 version of the fixture's original globe shade.
Since I already owned the spray paint, I only spent $7.99 on the update (the cost of the new shade). I thought about buying a new light fixture altogether and did a lot of searching, but I kept coming back to this cute little globe. I think it suits our entryway - it just needed an update for 2013.
Here's the After & Before:
0
comments
Posted by
nove
Labels:
DIY,
entryway,
lighting,
spray paint
Painted headboard
I finished painting our headboard over the weekend and wanted to share a little sneak peek. I'm making a few tweaks to the rest of our bedroom - sparked by some great suggestions from Shannon - so I'll share the whole thing with you when I'm done :)
In terms of the how-to, I sprayed the entire headboard with Rustoleum's Ultra Cover primer, followed by their Ultra Cover satin heirloom white. There aren't many warm and windless days this time of year, so it took two entire cans (1 can of primer + 1 can of paint) to cover the headboard (and if I'm being honest, there are a few spots that still need touching up).
For the finials, I used Martha Stewart's bronze liquid gilding. It was my first time using it and this stuff is awesome. I did two coats - only one was really needed - and it was easy to apply. The only downside is the smell, so make sure you open a window. And yes, I'm now tempted to gild everything we own.
Now that it's done, I'm so glad I listened to you guys and broke out the paint. I. love. it.
0
comments
Posted by
nove
Labels:
bedroom,
DIY,
gilding,
headboard,
spray paint
DIY gold chair
My chair is finally gold!
On Monday I called Rust-Oleum and explained what happened. They suggested that I return the paint to Home Depot. When I accidentally bought the silver paint, Home Depot was out of Rust-Oleum's gold spray paint. They had fully restocked since then, and next to the cans of gold, I realized there was nothing wrong with the cans I bought, their caps just weren't silver (and the cans weren't marked). Luckily Home Depot's customer service department was very understanding. They explained that they couldn't take the silver spray paint back (I'd already used a can and a half), but they gave me two cans of gold spray paint, free of charge.
I love the gold. And the new seat cushion.
To make it, Adam cut a piece of plywood to size for me (1) and I cut a piece of foam to match (2). I used a little spray adhesive to secure the foam to the plywood before wrapping it with some batting (3) and stapling it to the back of the plywood. Finally, I wrapped the whole thing with my fabric and secured it with more staples (4).

So cheerful.
I bought the chair on Kijiji a few years ago and the rest of the supplies were leftover from other projects. My only purchases were the fabric and two cans of spray paint, so this makeover was less than $25 - and worth every penny :)
0
comments
Posted by
nove
Labels:
DIY,
furniture makeover,
Living Room,
spray paint
Colour mismatch
| {the colour I thought I was buying - note the caps} |
| {and the colour I actually got} |
I'm working on a little chair transformation, but as you can see, the gold spray paint I bought came out silver! I tweeted about it yesterday and Rust-Oleum responded right away. I'm going to try their customer service line on Monday and hopefully they'll hook me up with the right colour ASAP. The silver doesn't look half bad, but I have my heart set on a gold chair. Not happy that I have to spray paint it again, but at least it doesn't take long to do!
0
comments
Posted by
nove
Labels:
DIY,
furniture makeover,
spray paint
DIY message center
| {DIY message center} |
So when I spotted this wooden display case (at least that's what I think it is) at my local Value Village, I knew I wanted to turn it into a mini message center.
These frame hangers (there was one in each of the top corners) are what made me think it was some kind of display case. I just unscrewed them and voila - instant tray.
After some light sanding and a quick wash, I took it outdoors for a coat of spray primer.
While I was out there, I also sprayed a coat of primer on an empty tin can I'd been meaning to turn into a pen/pencil holder. Once the primer was dry (and after driving to Adam's parents' house to celebrate Mother's Day), I applied three or four light coats of spraypaint, allowing 20-30 minutes of drying time between coats (Adam's parents are well aware of my DIY-obsessed ways and didn't blink an eye when I started unpacking my supplies in their backyard).
In my experience, a good paint job is all about patience (needless to say it's a struggle for me everytime). Light coats are the way to go, even if it means 5 instead of 2, and make sure you give your paint enough time to dry between coats (obviously follow the instructions on the can, but as a general rule I'd say longer = better).
| {I used Rust-Oleum's gloss white on my pen/pencil holder} |
| {and satin aqua on my tray} |
| {DIY message center} |
| {it turns out that tin cans make great pen holders} |
Have you spraypainted anything lately?
0
comments
Posted by
nove
Labels:
DIY,
Living Room,
spray paint
Black and white lamp DIY
I finished sanding the walls in our bedroom on Saturday (!!!) and on Sunday I applied the skim coat. I'll do a before and after post once the walls are primed, but now that things are moving along (knock on wood), I've started working on some of the pieces for the room (hint: see lamp above).
You may remember the black and white lamp from my inspiration board (which you can check out here). The plan was to spraypaint our current ceramic table lamps white, until I accidentally shattered one while trying to straighten its lamp shade (apparently I'm stronger than I look). Since I wasn't loving the shape of those lamps anyway, I took it as a sign and moved onto Plan B. I found this lamp in our basement - an old Value Village purchase that I spraypainted black, never used, and was then commandeered by Adam and his bandmates for screenprinting:
I spraypainted it white and added the broken lamp's shade. You can't really tell in the picture, but it has a really glossy finish, which I love.
So no matching table lamps, which is fine, since we never used more than one lamp at a time anyway. What projects did you get up to this weekend?
0
comments
Posted by
nove
Labels:
DIY,
lighting,
spray paint
Spray painting old hardware
Old houses like ours usually come with old windows. And old windows usually come with cracked paint, drafts and old hardware. While we're saving to replace our windows with energy-efficient ones, we spruced up the old guys with a fresh coat of white paint. The paint made a huge difference, but it also made the dingy old hardware stand out. I tried cleaning it, but that didn't work very well, so I decided to try spray-paint instead. Here's what the hardware looked like before (unfortunately I seem to have photographed one of the better ones - most were really discoloured or paint-covered):
I removed all the locks and placed them on some newspaper outside. Then I sprayed them (including the screws) with several thin coats of Krylon metallic spray paint in silver. It was a really easy project - the hardest part was remembering to put the lock in different positions, since different parts of the lock show when it's open versus closed.
I'm really happy with how the project turned out - it's a great temporary fix until we can afford new windows - and I'm already planning to update other hardware this way...like maybe doorknobs?
0
comments
Posted by
nove
Labels:
DIY,
hardware,
spray paint
Pretty hanging plate display
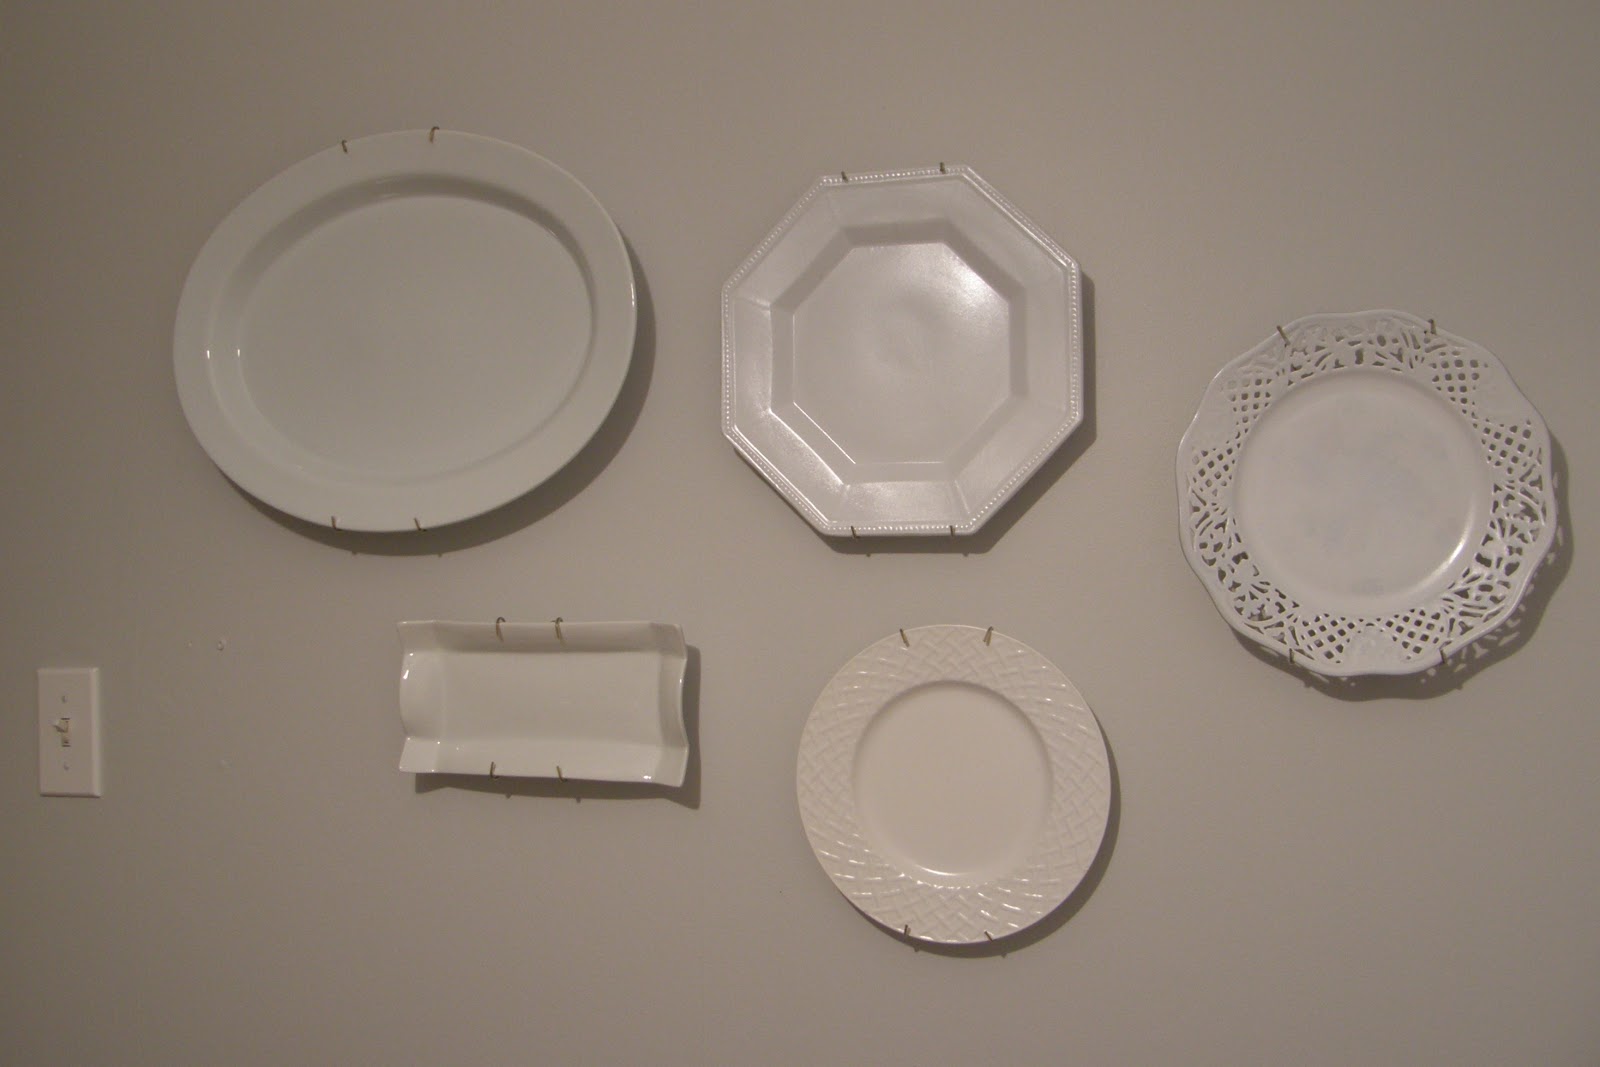
My new bedroom lamps weren't the only thing I spray painted over the weekend. I also finally got around to spray painting a few plates I found at Value Village for less than $1 each - they're for a hanging plate display in my dining room.
Unfortunately I forgot to snap any "before" pics (oops), but here's an "after" shot of all three plates. The two on the left were already white, but different shades, so I spray painted them to better match (it's not perfect, but it's much better). The plate on the right had a pretty ugly floral pattern that I happily covered.
And here are a few shots of the whole shebang:
Like my gallery wall, I'm planning to add to it as I go. I just need more plates first.
Unfortunately I forgot to snap any "before" pics (oops), but here's an "after" shot of all three plates. The two on the left were already white, but different shades, so I spray painted them to better match (it's not perfect, but it's much better). The plate on the right had a pretty ugly floral pattern that I happily covered.
And here are a few shots of the whole shebang:
Like my gallery wall, I'm planning to add to it as I go. I just need more plates first.
0
comments
Posted by
nove
Labels:
Art,
decorating,
Dining Room,
DIY,
spray paint
Spray painted lamps DIY
I found these matching lamps on Kijiji:
It was a beautiful day on Sunday, so while Adam raked the lawn, I decided to spray paint. I started by taping off the parts of the lamps I didn't want to get paint on and then shook my can of spray paint like crazy for 1-2 minutes (that's our dog Maddie checking out my set up).
And lights on...
It was a beautiful day on Sunday, so while Adam raked the lawn, I decided to spray paint. I started by taping off the parts of the lamps I didn't want to get paint on and then shook my can of spray paint like crazy for 1-2 minutes (that's our dog Maddie checking out my set up).
Next, I applied multiple thin coats of spray paint, allowing 1-2 minutes of drying time between coats. I've learned the hard way that there are two keys to a good paint job: keep the can 6-8 inches away from the surface you're painting and keep your paint can moving at all times (kind of like you're conducting an orchestra). The whole job took about 15 minutes (including 10 minutes of drying time).
And here's one inside, where the colour isn't quite so smurf-like. Lights off:
And lights on...
during the daytime, so admittedly it's not all that dramatic. I'm really happy with how these lamps turned out - I think it's my best spray painting job to-date. Now I'm on the hunt for some new bedside tables. I want something a little lighter, a little less clunky, and with storage (of course, you've never seen our bedside tables, so you have no idea what I'm talking about - pictures to come, I promise).
0
comments
Posted by
nove
Labels:
DIY,
lighting,
spray paint
Subscribe to:
Posts (Atom)
+(1).jpg)
+(1).jpg)